Getting Started with AWS EKS using Terraform
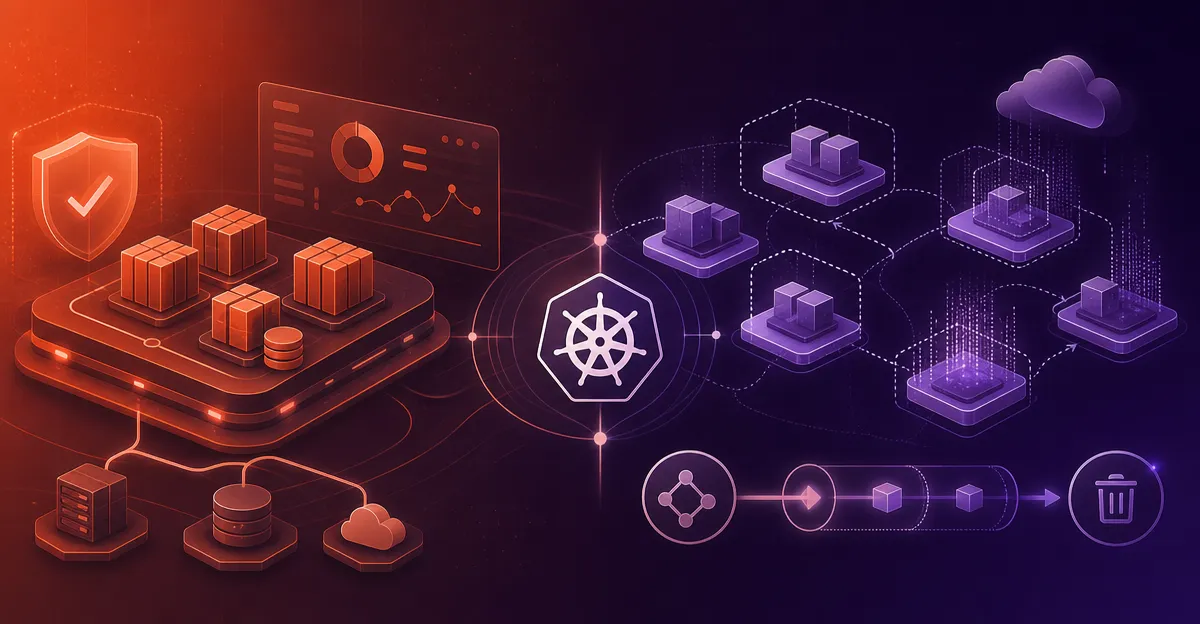
Discover Kubernetes (K8s), the leading open-source container orchestration system, streamlining the deployment, scaling, and management of containerized applications. Explore the architecture of a Kubernetes cluster, empowering seamless application management and scalability.

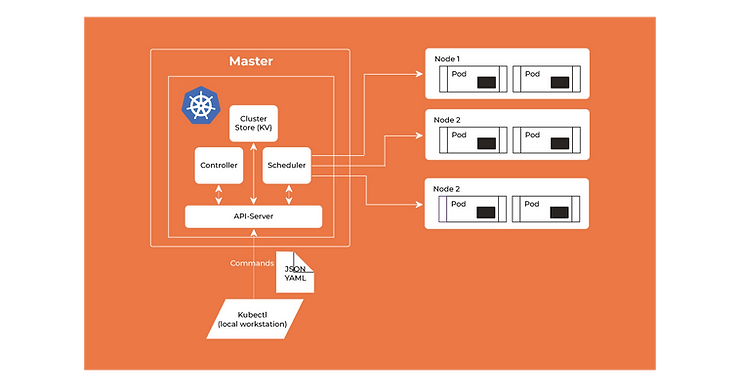
Kubernetes (K8s) is an open-source container orchestration system for automating deployment, scaling, and management of containerized applications. Following is the architecture of a Kubernetes cluster.
There are different ways to provision a Kubernetes cluster
-
Minikube: Easily create a local, single-node Kubernetes cluster for development and testing
-
kubeadm: Bootstrap a Kubernetes cluster conforming to best practices. Can be installed on various types of platforms and can easily integrate with provisioning systems such as Terraform or Ansible
-
Kops: Create, destroy, upgrade and maintain production-grade, highly available Kubernetes clusters from the command line on AWS only
-
Hosted/Managed Solutions: Almost all clouds provide managed Kubernetes services like Azure offers AKS, IBM cloud offers IKS, Google offers GKE and AWS offers EKS.
In Managed Kubernetes, you don’t have to manage the master node components of K8s, rather the cloud manages that, and you just provision the worker nodes and the cloud will handle the uptime and related features. You just start deploying your workloads on the cluster.
In this post, I will be discussing how to provision an AWS EKS cluster using Terraform. Terraform is a tool to manage your infrastructure as code so rather than provisioning an EKS cluster and related things manually, you can use terraform to provision them for you.
You can install terraform by following this link. And you can verify it by running
$ terraform
Usage: terraform [--version] [--help] <command> [args]The available commands for execution are listed below.
The most common, useful commands are shown first, followed by
less common or more advanced commands. If you're just getting
started with Terraform, stick with the common commands. For the
other commands, please read the help and docs before usage.Common commands:
    apply              Builds or changes infrastructure
    console            Interactive console for Terraform interpolations
# ...
And confirm the version by running
terraform version
Assumptions
-
You’ve created a Virtual Private Cloud (VPC) and subnets where you intend to put the EKS resources. The VPC satisfies EKS requirements.
-
You have aws configured locally i.e. your ACCESS_KEY and SECRET_ACCESS_KEY is set and you have a user that has these permissions
-
If manage_aws_auth = true, it’s required that both kubectl (>=1.10) and aws-iam-authenticator are installed and on your shell’s PATH.
Steps
-
Get the VPC and subnet ids and the region in which you want to create an EKS cluster.
-
Create a file main.tf in which we will define the cluster manifest and for simplicity, instead of using variables, we will be using locals and defining customizable variables there.
Create a locals section in the file and copy following manifest in it and replace the variables with your values
locals{
    vpc_id = "vpc-1234ab"
    region = eu-west-1
    cluster_name = "dev-eks-cluster"
    subnets = ["subnet-1234", "subnet-1235", "subnet-1236"]
    cluster_enabled_log_types = ["api", "audit", "authenticator", "controllerManager", "scheduler"]
    asg_desired_capacity = 1
    asg_max_size = 3
    asg_min_size = 1
    instance_type = "m4.large"
    spot_price = "0.20"
}
These are the customizable variables that will be used in the terraform module. The variables are self-explanatory like VPC id and subnet ids where your EKS cluster will be running. The variable cluster_enabled_log_types is the list of the desired control plane logs to enable. These logs will be available in Cloudwatch -> LogGroups. The other variables are regarding the Autoscaling Group Instance counts.
We also focus on cost reduction so we are using Spot Instances rather than dedicated instances. So you can set the spot_price that you want to bid for the instances. Spot instances are almost 80–90% cheaper than normal dedicated instances. For details about Spot Instances vs Dedicated Instances see AWS Instance Purchasing Options.
To see a real-world example of cost reduction on AWS, you can refer to this case study that highlights how effective strategies can lead to significant savings.
Add a provider aws and terraform section to specify region and version.
provider "aws" {
  region  = local.region
}
terraform {
  required_version = ">= 0.12.7"
}
And now setup the EKS module to be used
module "eks-cluster" {
  source       = "terraform-aws-modules/eks/aws"
  version = "v7.0.1"
  cluster_name = local.cluster_name
  subnets = local.subnets
  vpc_id  = local.vpc_id  worker_groups = [
    {
      spot_price = locals.spot_price
      asg_desired_capacity = locals.asg_desired_capacity
      asg_max_size = locals.asg_max_size
      asg_min_size = locals.asg_min_size
      instance_type = locals.instance_type
      name = "worker-group"
      additional_userdata = "Worker group configurations"
      tags = [{
          key                 = "worker-group-tag"
          value               = "worker-group-1"
          propagate_at_launch = true
      }]
    }
  ]  map_users = [
      {
        userarn = "arn:aws:iam::AWS_ACCOUNT:user/AWS_USERNAME"
        username = "AWS_USERNAME"
        groups = ["system:masters"]
      },
    ]
  cluster_enabled_log_types = local.cluster_enabled_log_types
  tags = {
    environment = "dev-env"
  }
}
Your final file should have all of the above manifests and should look like
terraform {
  required_version = ">= 0.12.7"
}

locals{
    vpc_id = "vpc-1234ab"
    region = "eu-west-1"
    cluster_name = "dev-eks-cluster"
    subnets = ["subnet-1234", "subnet-1235", "subnet-1236"]
    cluster_enabled_log_types = ["api", "audit", "authenticator", "controllerManager", "scheduler"]
    asg_desired_capacity = 1
    asg_max_size = 3
    asg_min_size = 1
    instance_type = "m4.large"
    spot_price = "0.20"
}

provider "aws" {
  region  = local.region
}

module "eks-cluster" {
  source       = "terraform-aws-modules/eks/aws"
  version = "v7.0.1"
  cluster_name = local.cluster_name
  subnets = local.subnets
  vpc_id  = local.vpc_id
  worker_groups = [
    {
      spot_price = local.spot_price
      asg_desired_capacity = local.asg_desired_capacity
      asg_max_size = local.asg_max_size
      asg_min_size = local.asg_min_size
      instance_type = local.instance_type
      name = "worker-group"
      additional_userdata = "Worker group configurations"
      tags = [{
          key                 = "worker-group-tag"
          value               = "worker-group-1"
          propagate_at_launch = true
      }]
    }
  ]
  map_users = [
      {
        userarn = "arn:aws:iam::AWS_ACCOUNT:user/AWS_USERNAME"
        username = "AWS_USERNAME"
        groups = ["system:masters"]
      },
    ]
  cluster_enabled_log_types = local.cluster_enabled_log_types
  tags = {
    environment = "dev-env"
  }
}
3. Replace the above placeholders with your values. You can set the worker nodes autoscaling group desired, minimum and maximum capacity and the spot price for the nodes in the worker_groups section
In the map_users section, you can add any other AWS user that you want to have access to the cluster that you created.
These are the simplest variables that you can set to create your cluster, for other variables and their details, see Terraform-AWS-EKS-Inputs.
4. After this run
terraform init
terraform apply
This will show the resources that the terraform module will create and will ask you to confirm them, type yes so terraform will start creating.
It takes sometime to create the cluster almost 10 minutes, and after that if everything goes smooth hopefully, terraform will show
Apply complete! Resources: N added, 0 changed, 0 destroyed.
It will also add the kubeconfig of your cluster in the folder directory. And a configmap, which will contain the user that you had given permission while creating the cluster. That user/users and the user that created the cluster can access the cluster using the kubeconfig.
5. Run the following commands to verify your access to the cluster
kubectl get nodes --kubeconfig kubeconfig_dev-eks-cluster
kubectl get pods --all-namespaces --kubeconfig kubeconfig_dev-eks-cluster
And your EKS cluster is ready, you can start deploying your workloads and take use of managed Kubernetes from AWS.
Cleanup
Now to destroy the workloads, run
terraform destroy
And it will show resources that will be deleted, acknowledge it by entering yes and the resources will be deleted.
Cost
Cost of Running an EKS cluster is $0.10 per hour, so for a month(almost 744 hours) it becomes almost 75$ per month per EKS cluster(the master instance that AWS manages for you) in AWS. Other than this, the cost for worker nodes is dependent on number & type of EC2 instances that you create and their cost is the same as you create a normal EC2 instance.
We deployed StakaterPlatform(A consolidated solution that helps the community to adopt Security, Monitoring, Logging, Tracing, Alerting and CI/CD processes for their workloads) and Stakater’s production grade applications which needs almost 8 VCPUs & 32 GB of RAM(2 * t2.xlarge spot instances) and it cost us around 5-6$ per day which is quite reasonable keeping in view that the master is managed by AWS and they will guarantee the uptime of master components.
If you’re looking for expert guidance on your Kubernetes journey, explore our Kubernetes consultancy services, which provide tailored solutions to enhance your Kubernetes deployments.
Stakater also offers several open-source projects to support your DevOps needs. Check out Reloader, which helps in reloading Kubernetes deployments when ConfigMaps or Secrets change, Ingress Monitor Controller, which automates monitoring of your ingresses, and Forecastle, a control panel for managing your Kubernetes applications, all available on GitHub.